In this ‘WordPress Google Tag Manager’ guide you’ll learn how to add Google Tag Manager to your WordPress site so you can easily manage multiple pixels and tracking codes. It will save you a ton of time and energy while keeping all your tracking assets in one place. Continue reading to learn more about the WordPress Google Tag Manager.
Goal
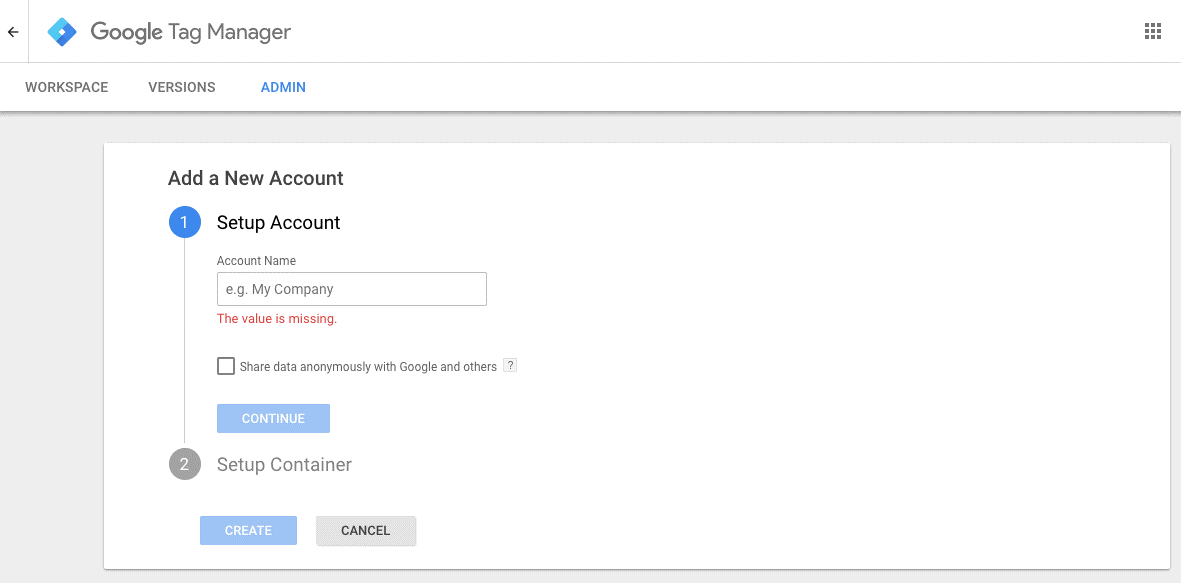
To add Google Tag Manager to a WordPress site.
Ideal Outcome
Google Tag Manager is properly installed without any technical issues.
Prerequisites or Requirements
This exact process only applies to WordPress.org sites.
Why this is Important
Google Tag Manager is a great tool to add and manage multiple pixels and tracking codes without needing to edit the code of a site.
Where this is Done
In your WordPress install and Google Tag Manager.
When this is Done
Only once-the first time you install Google Tag Manager.
Who does This
The person responsible for website management or analytics.
Environment Setup
Important: This ‘WordPress Google Tag Manager’ guide works only for self-hosted WordPress sites, aka WordPress.org and not WordPress.com
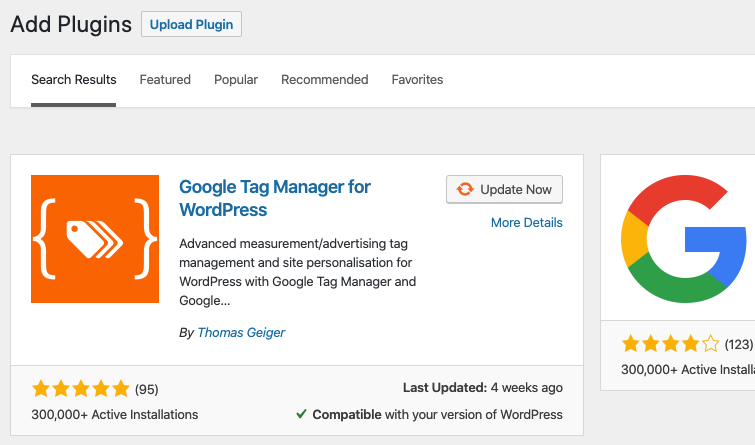
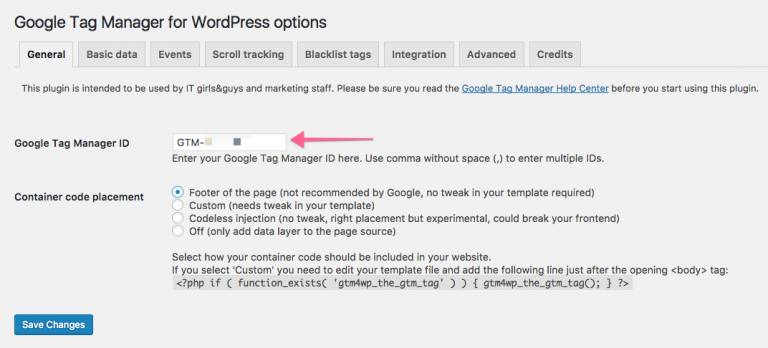
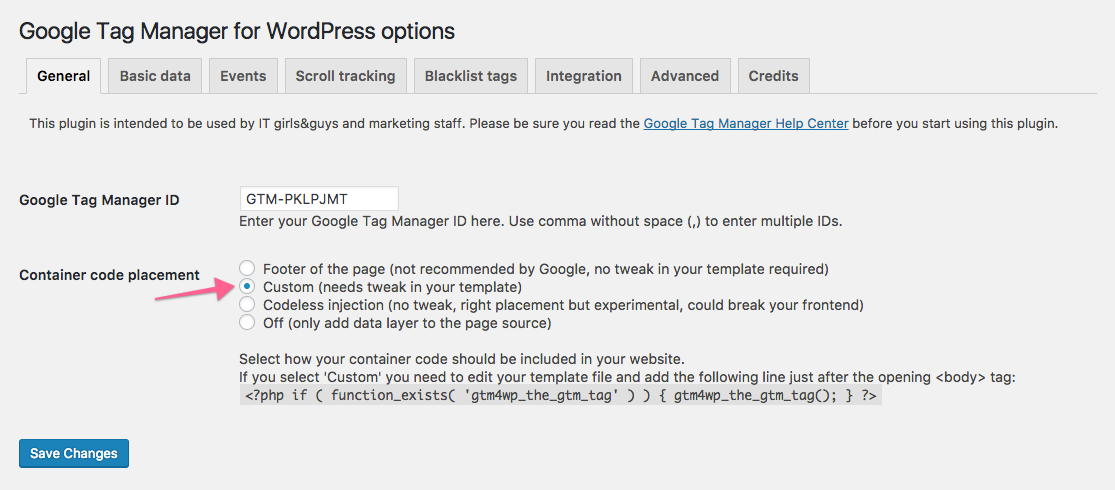
6. In the WordPress sidebar, go to Settings > Google Tag Manager
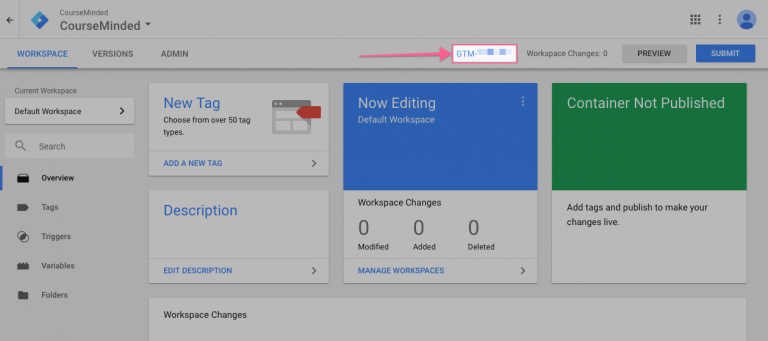
7. Paste your Google Tag Manager ID (the one you got from the Google Tag Manager dashboard) in the available field
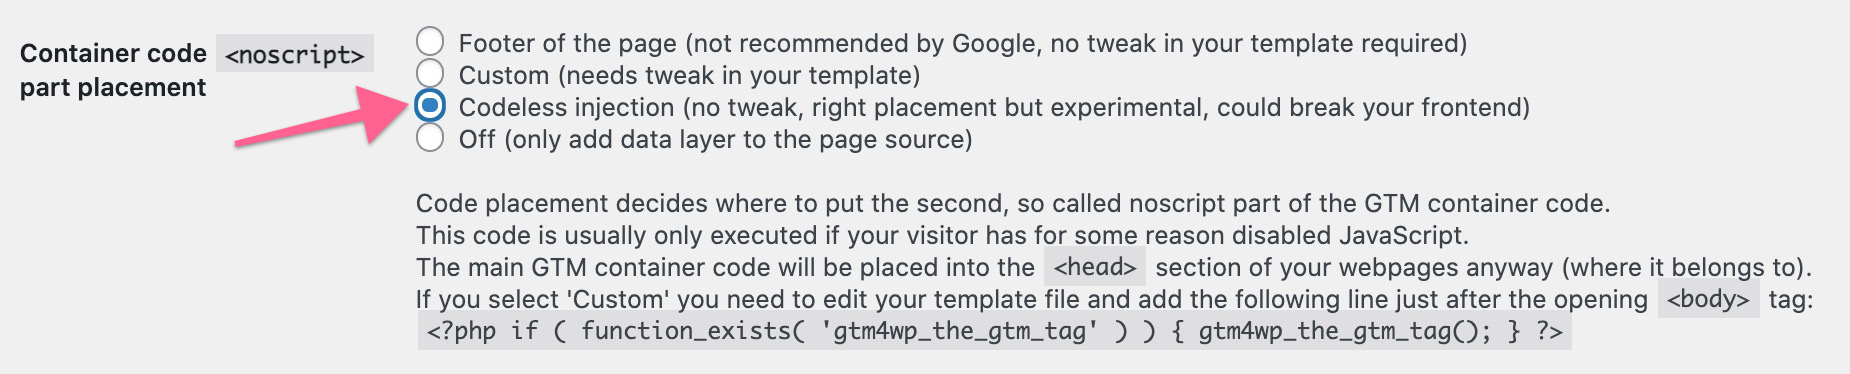
8. The plugin offers several ways to install the container code on your site. Before you implement any of these, we recommend you create a backup of your site.
a.Option 1: Codeless injection – with this option, the plugin will try to figure out the right placement for the container for you. This is the easiest option but there’s a small risk it might break something on the frontend of your site. If you decide to go with codeless injection, select this option from the list and click “Save changes”
After selecting this, visit the website in a new tab or window and make sure everything looks right. If it does, you can move on to the next step of QA-ing the installation.
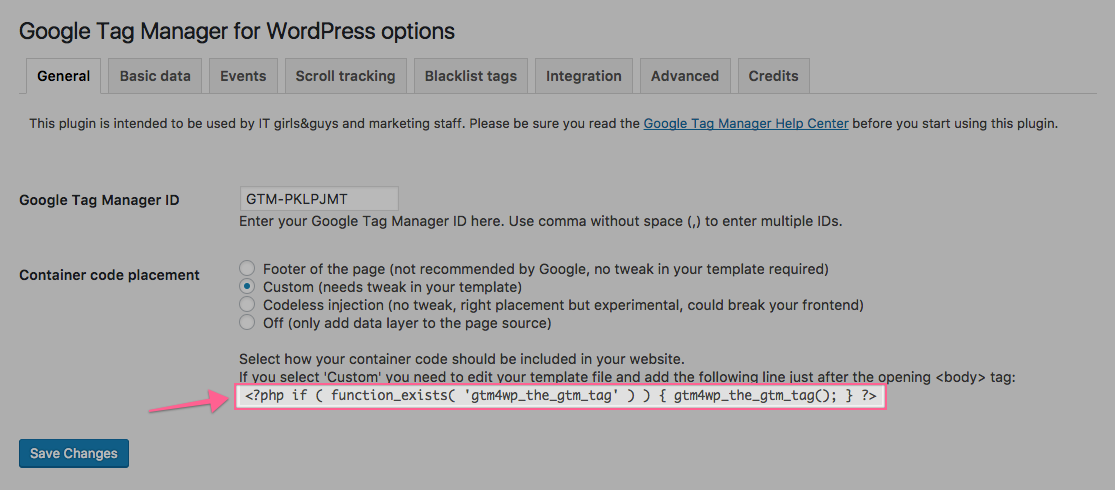
b. Option 2: Custom – with this option, you will need to make a small edit to your theme files. If your WordPress theme allows you to make changes and you’re comfortable with the theme editor, you can use this option. Select the “Custom (needs tweak in your template)” container code placement and click on “Save Changes”.
c. Copy the php code provided by the plugin and click on “Save Changes”
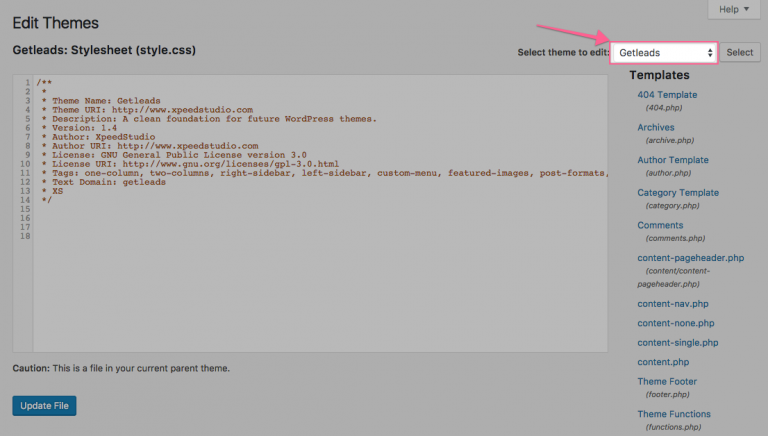
d. In the WordPress sidebar, go to Appearance > Theme Editor
e. Make sure that you are editing the Theme that you currently have installed in your site (you can go to Appearance > Themes to check the name of the theme you are using)
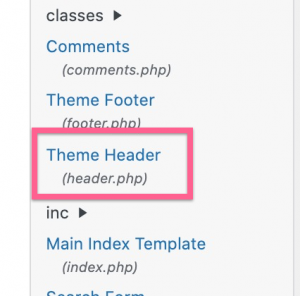
f. Select the “Theme Header” template from the list on the right.
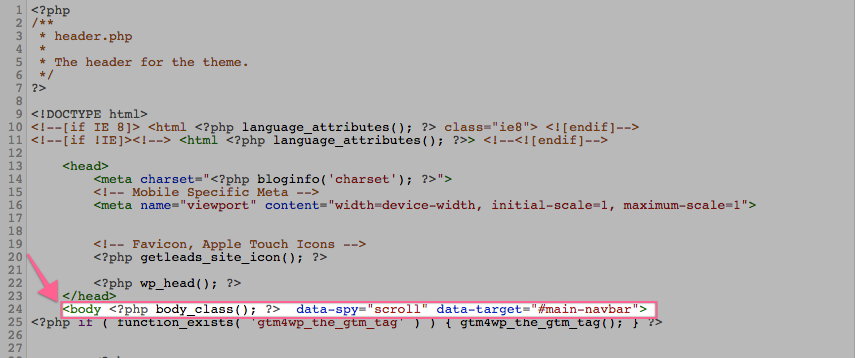
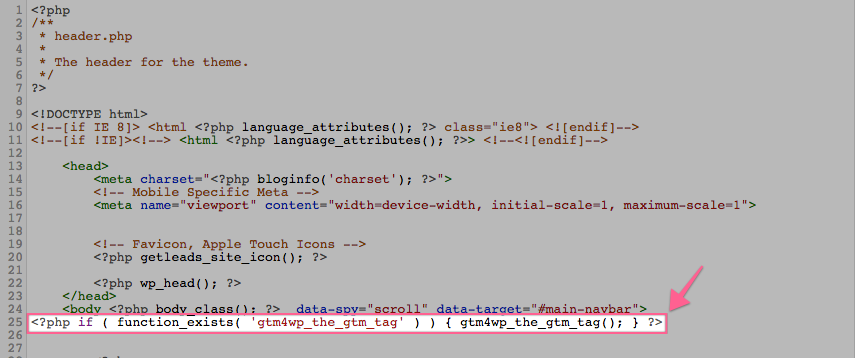
g. This template is different depending on the theme that you have installed. However, you will alway be able to find an opening [body] tag in the code.
h. Paste the php code provided by the plugin right below the opening [body] tag.
i. Click on “Update File”
QA-ing Your WordPress Google Tag Manager Installation
1. Open your website homepage using Chrome.
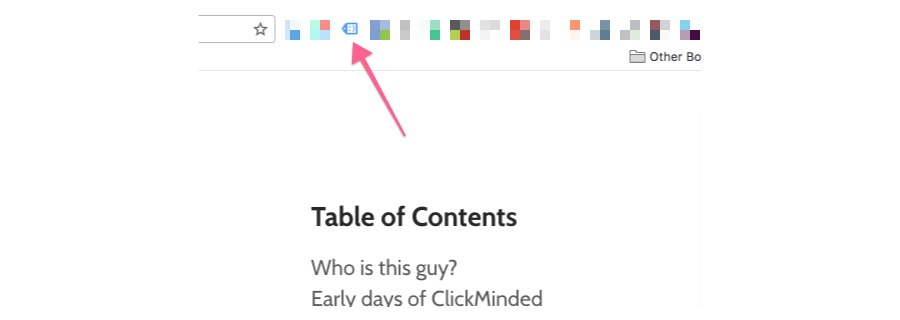
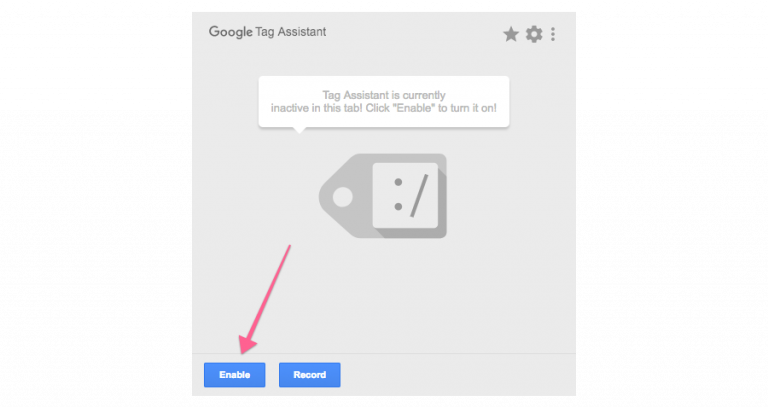
2. Click on the Google Tag Assistant Chrome Extension
3. Click on “Enable”
4. Refresh the page and click on the Google Tag Assistant Chrome Extension again
5. You should see a green tag for Google Tag Manager, indicating that the installation was successful.