In this ‘How to Backup WordPress Site’ guide we will teach you the best practices when it comes to backing up and restoring your WordPress site. Backing up your WordPress site is a critical process which should be done on an automated or regular basis especially when making any major updates. This step which is often overlooked can save you from tons of headaches, lost time, and revenue for your business. Follow the guide below to learn more.
Goal
To successfully adopt a WordPress backup solution that allows you to always have a backup on hand and recover your website from it.
Ideal Outcome
Your WordPress website creates periodic backups of your website to cloud services, and you can restore it using these files.
Prerequisites or Requirements
This ‘How to Backup WordPress Site’ guide only works for WordPress websites.
When This Is Done
A backup solution should be installed as soon as possible. Restoring from a backup should only be seen as a last resort as the process may cause data loss itself.
Why This Is Important
There are multiple reasons why you might want to always have a backup of your website. Severe issues can arise either through a mistake by your web hosting company, a faulty plugin or theme, a corrupted upgrade, having your server compromised, among others. Having a solution that allows you to get up and running in less than an hour is vital.
Where This Is Done
In your WordPress Admin panel.
Who Does This
The person responsible for website maintenance or server management.
Environment Setup
1. Install Updraft on your WordPress website:
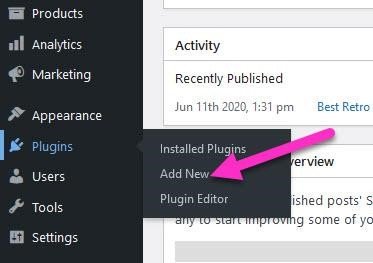
i. Inside the WordPress Admin Panel, head over to ‘Plugins’ → ‘Add New’
ii. Search for “Updraft”
iii. Click “Install Now” and then click “Activate”.
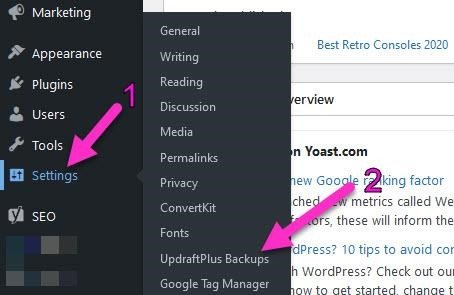
iv. A new “UpdraftPlus Backups” option should appear on the sidebar of your WordPress admin under “Settings”, click that link:
iv. A new “UpdraftPlus Backups” option should appear on the sidebar of your WordPress admin under “Settings”, click that link:
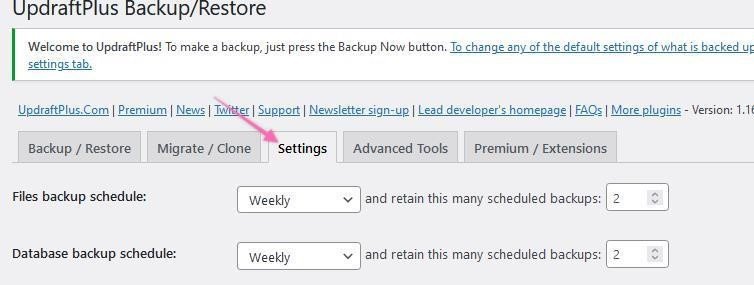
2.Configure the default settings:
a. Click “Settings”
b. Edit the following fields:
i. Files backup schedule: This is the frequency you need WordPress to back up your files automatically.
Note:Your files do not include your website content, it only includes files and folders on your server (e.g.: Your plugin files, your theme files, your uploaded images, etc.)
Note 2:Typically, you will want to do at least a monthly backup. But there is no need to create a backup every day if you only update your website once a month. If you are unsure, you can perform the following exercise:
1.“On average how many times per month do I change or update my website content, plugins or theme?” Use that number to calculate the backup schedule you need.
a.E.g.: “4. I create a post in the first three weeks, and in the last week of the month I deploy new website features.” → “Weekly”
“And retain this many scheduled backups”: Enter here how many ‘previous’ backups you want to keep before deleting them.
Note:Do not set a number so high that it will consume a lot of your system resources but also make sure you have at least 2 backups on-hand just in case you only detected an issue after a while.
Note 2: Be mindful of the schedule you have selected before. For instance, if you selected 1 backup every day and you selected to retain 2 scheduled backups this means that if you only detect an issue 3 days after it happened you will no longer have access to a good backup.
ii. Database backup schedule: This is the frequency you need WordPress to back up your database automatically. You can select the same frequency you selected for your files on the last step.
Note: Your database does not include your entire WordPress website, instead it will include, for instance, your Blog Posts, Pages, Comments and some settings.
“And retain this many scheduled backups”: You can select the same option you selected for your files on the previous steps.
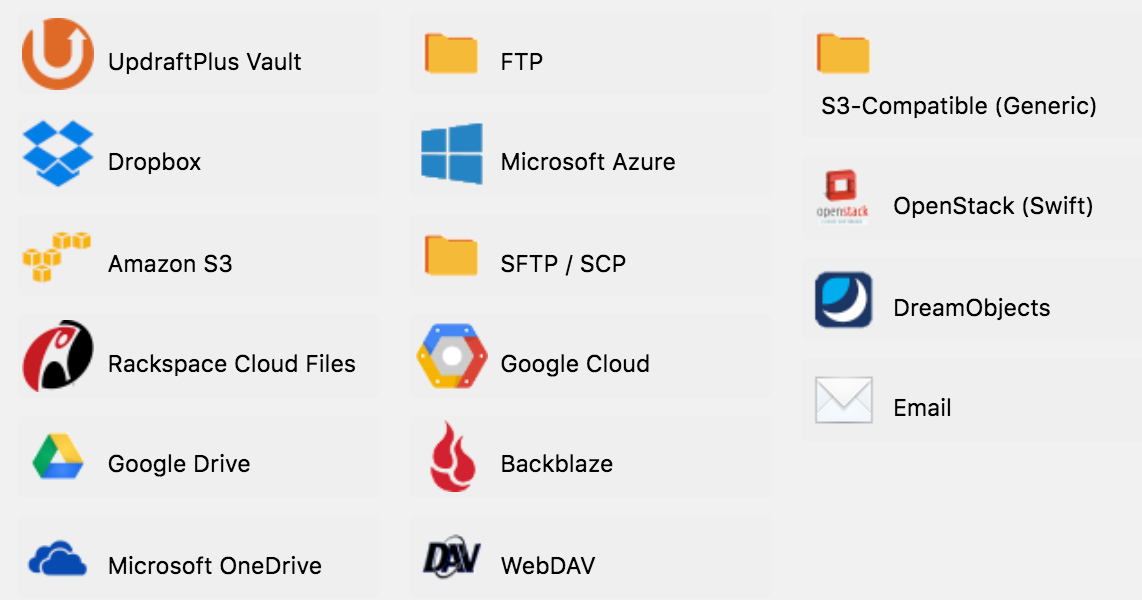
iii.Choose your remote storage: Select the cloud storage service you work with or the one where you will want to store these automatic backups.
Important: It is not recommended to simply store your backups on the same server as this will cause a single point of failure. If your server gets compromised the attacker can delete any backups you may have. Furthermore, if the issue that you are trying to recover from deleted or corrupted the files on your server, you will have no backups available.
1. Click on “Google Drive”.
Note:This ‘How to Backup WordPress Site’ guide will cover the process for Google Drive, but you can use any other service you prefer.
2. Scroll down and click “Save Changes”:
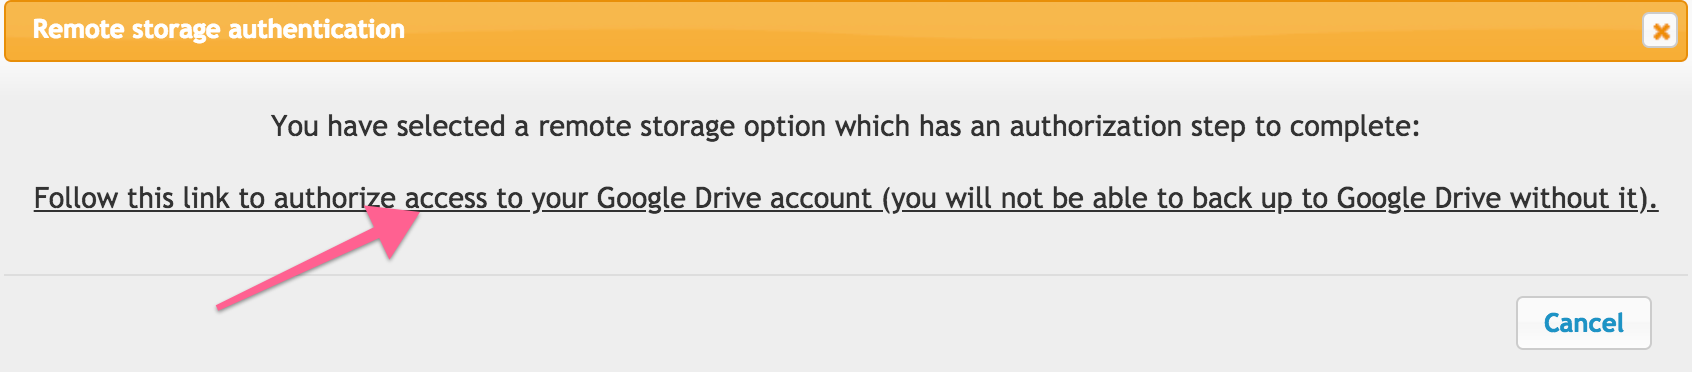
3. Click the link to authorize access to your cloud service:
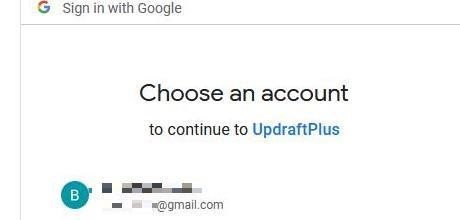
4. Log In to your cloud service:
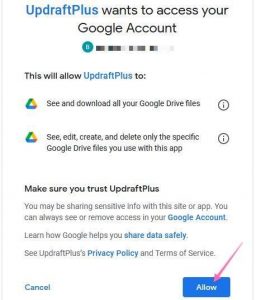
5. Allow access to your account:
7. You will be taken to an Updraft page, click “Complete Setup”:
8. You will see a message confirming you have authenticated your account:
9. That’s it, you have now enabled automatic backups to a cloud service!
a. Note:If you want to be extremely cautious you can purchase an add-on (affiliate link) for this plugin that will allow you to store backups in multiple locations.
Creating a Manual Backup
1. Open Updraft settings by clicking “Settings” → “UpdraftPlus Backups” on the sidebar:
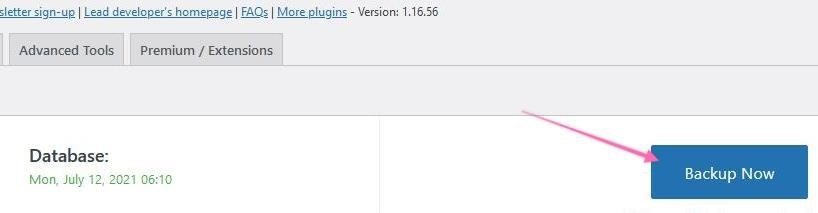
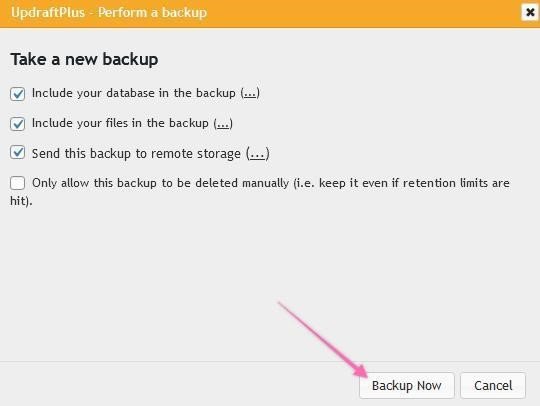
2. Click “Backup Now”:
3. A pop-up will appear, click “Backup Now” once again:
4. You will see a progress bar appearing on the page:
Note:Depending on the size of your website and the resources on your server this process might take several minutes or more. You don’t need to keep the window open; the process will run in the background.
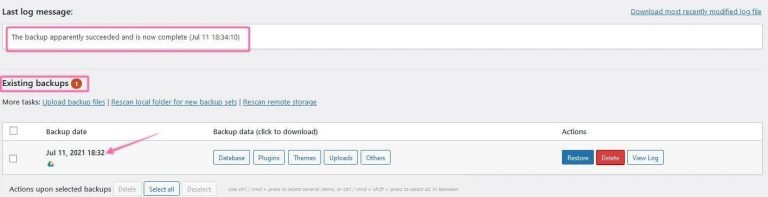
Note 2:Once ready you will see a message with the last backup date:
5. To download the backup, scroll down to ‘Existing Backups’ (See screenshot above).
6. To download the backup, click “Existing Backups” on the top navigation:
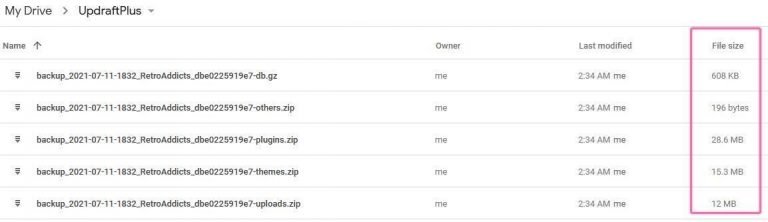
a. Select the backup data you want to download to your computer. Ideally, you should keep a local backup of all of them → Click “Download to your computer”.
b. Save the files locally. This way, you have an online and an offline backup.
Restoring From a Backup
Note:Depending on the size of your backups and your server resources this operation may carry some risks. Your server might not have enough resources to deal with the entire operation and some data might be recovered and some might not. If you are unsure, contact your web hosting provider. Typically, if your website is under 200MB there should be no issues even if you are using a limited-resources server.
Remember:You can check the size of your backups either by downloading them and checking locally on your computer or by simply looking at your cloud storage service.
1. Open Updraft settings by clicking “Settings” → “UpdraftPlus Backups” on the sidebar:
Note:If the issue you are restoring from is so severe that you don’t have access to your WordPress Admin panel anymore, you will have to install WordPress from scratch (out of the scope of this ‘How to Backup WordPress Site’ guide), and install Updraft again as covered at the beginning of this ‘How to Backup WordPress Site’ guide before following the next steps.
2. To restore the backup, scroll down to ‘Existing Backups’ on the top navigation, select your backup and click ‘Restore’:
Note:If you can’t find your backups on the list they might have been deleted from your server or cloud service, in that case, if you have a local backup, you can upload it by using the “Upload backup” feature on the top:
3. Tick the boxes of what components you will want to restore at this moment → Click “Restore”:
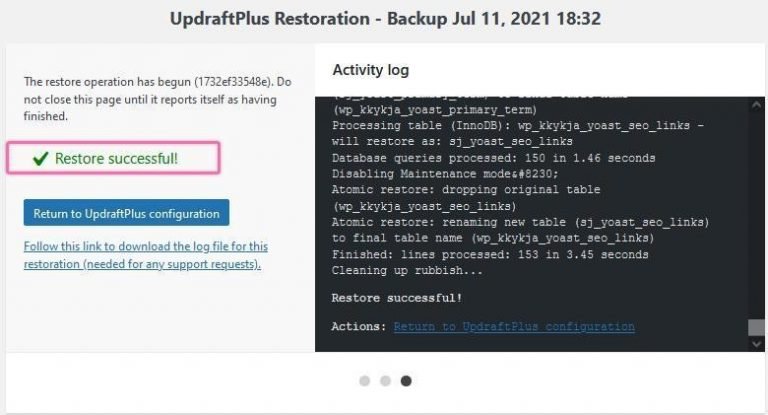
4. The restoring process will begin and when it is over, scrolling down you will see the following message:
5. Click ‘Return to UpdraftPlus configuration’ to return to the WordPress panel. That’s it, your WordPress website should be up and running as before!